A severe storm just passed through Austin. You hear dripping. You see a water stain spreading across your ceiling. Your roof is damaged—what do you do RIGHT NOW?
The first 24-48 hours after roof damage are critical. Quick action prevents $5,000 in roof damage from becoming $25,000 in water damage, mold remediation, and structural repairs. You must:
- Ensure safety (don't go on damaged roof)
- Stop water intrusion (emergency tarping/mitigation)
- Document everything (photos/video for insurance)
- Contact insurance immediately (within 24-48 hours)
- Get professional emergency repairs (from licensed contractor, not storm chaser)
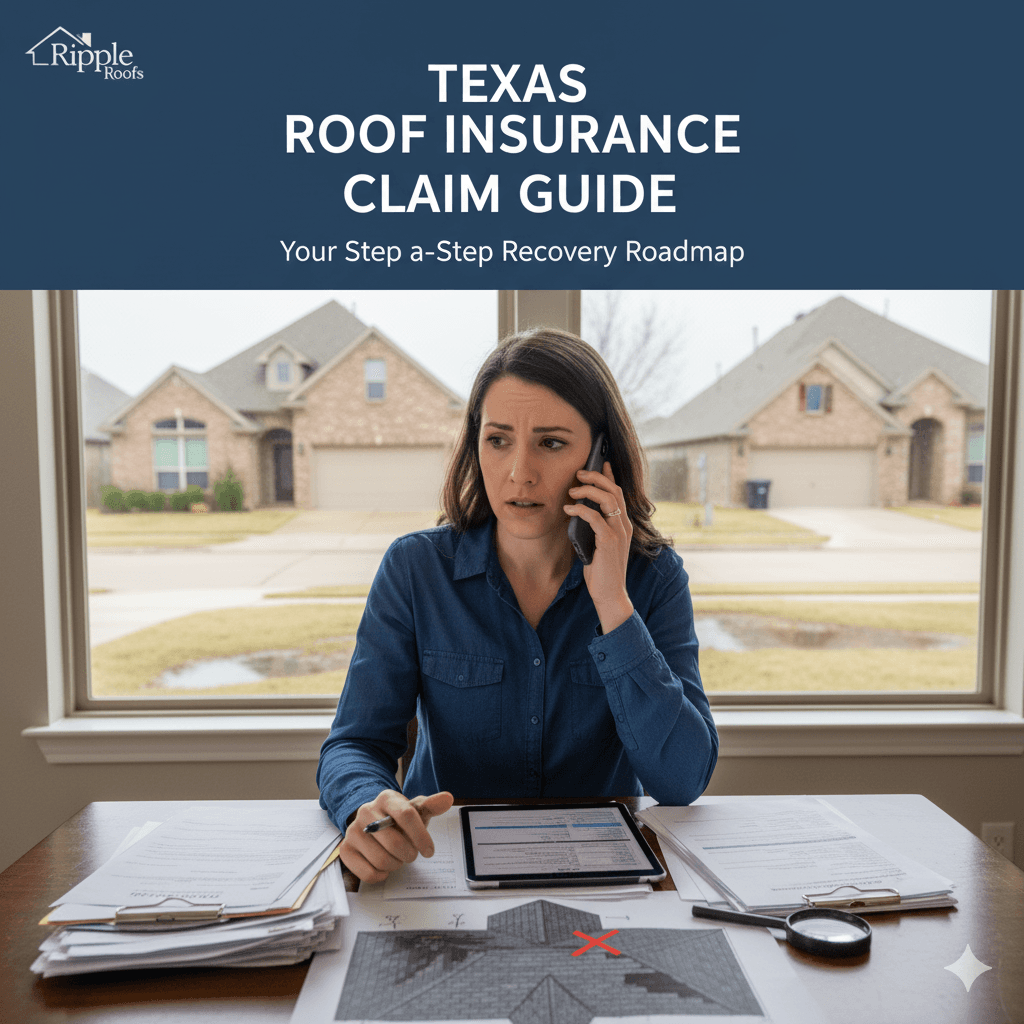
This guide walks you through every step—from the moment you discover damage through insurance claim and permanent repair. Austin homeowners who follow this process save thousands in additional damage and maximize insurance payouts. For detailed insurance claim guidance, see our complete roof insurance claim guide.
Need immediate help? Call our 24/7 emergency services at (512) 763-5277.
Time is critical. Let's get started.
Immediate Safety First (First 10 Minutes)
Before anything else, ensure everyone's safety.
Stay Off the Roof
DO NOT:
- ❌ Climb on wet, damaged, or debris-covered roof
- ❌ Walk on roof during or immediately after storm
- ❌ Attempt emergency repairs yourself if roof is unstable
- ❌ Let family members or pets access damaged areas
Why it's dangerous:
- Wet roofing is extremely slippery
- Hail-damaged shingles may be unstable
- Hidden structural damage could cause roof collapse
- Debris (branches, metal) creates trip hazards
- Electrical hazards from downed power lines
Exception: If you have roofing experience, proper safety equipment (harness, non-slip shoes), and roof is stable, you may assess damage. Otherwise, wait for professional.
Interior Safety Check
Immediate indoor hazards:
- Active leaks: Place buckets/tarps to catch water
- Electrical concerns: Turn off electricity in rooms with active leaks (water + electricity = electrocution risk)
- Ceiling bulging: Evacuate room immediately (ceiling may collapse from water weight)
- Gas smell: Evacuate home and call gas company
- Structural concerns: If you see sagging or hear cracking sounds, evacuate and call 911
Exterior Safety Check
From the ground, look for:
- Downed power lines: Stay 30+ feet away, call 911
- Hanging tree branches: Could fall and cause injury
- Unstable structures: Chimneys, fences, or roof sections about to collapse
- Gas leaks: Smell of gas or hissing sound near meter
If any of these exist, don't attempt any repairs—call emergency services.
Protect Family and Pets
- Move people and pets away from active leak areas
- Cover furniture with plastic tarps or sheets
- Move valuables away from leak areas
- Set up dehumidifiers if you have them (prevents mold)
Once everyone is safe, move to damage assessment.
Interior Damage Assessment (First 30 Minutes)
Document interior damage for insurance claim.
Check Every Room for Water Intrusion
Grab your phone and start photographing:
Ceilings:
- Water stains (brown/yellow discoloration)
- Active dripping
- Bulging or sagging drywall
- Visible holes or cracks
Walls:
- Water running down walls
- Stains near ceiling line
- Bubbling or peeling paint
- Wet insulation visible
Attic (if safely accessible):
- Daylight visible through roof (indicates holes)
- Water pooling on attic floor
- Wet insulation
- Water stains on rafters/decking
- Damaged roof decking (soft spots, holes)
Floors:
- Standing water
- Carpet saturation
- Tile/hardwood water damage
Document with Photos and Video
For insurance, capture:
- Overview shots: Entire room showing extent of damage
- Close-ups: Specific water stains, holes, damage
- Measurements: Use tape measure in photos (shows size of damage)
- Timestamps: Phone photos automatically timestamp (proves date)
- Video walkthrough: 2-3 minute video showing all damage (narrate what you're seeing)
Photo tips:
- Take 20-50 photos (too many is better than too few)
- Good lighting (use flash if needed)
- Multiple angles of same damage
- Include context (e.g., photo showing leak and bucket below)
- Don't clean up before documenting
These photos are critical for insurance claim—document everything now before cleaning up.
Exterior Damage Assessment (First Hour)
Once interior is documented and safe, assess exterior from the ground.
What to Look For (From Ground Level)
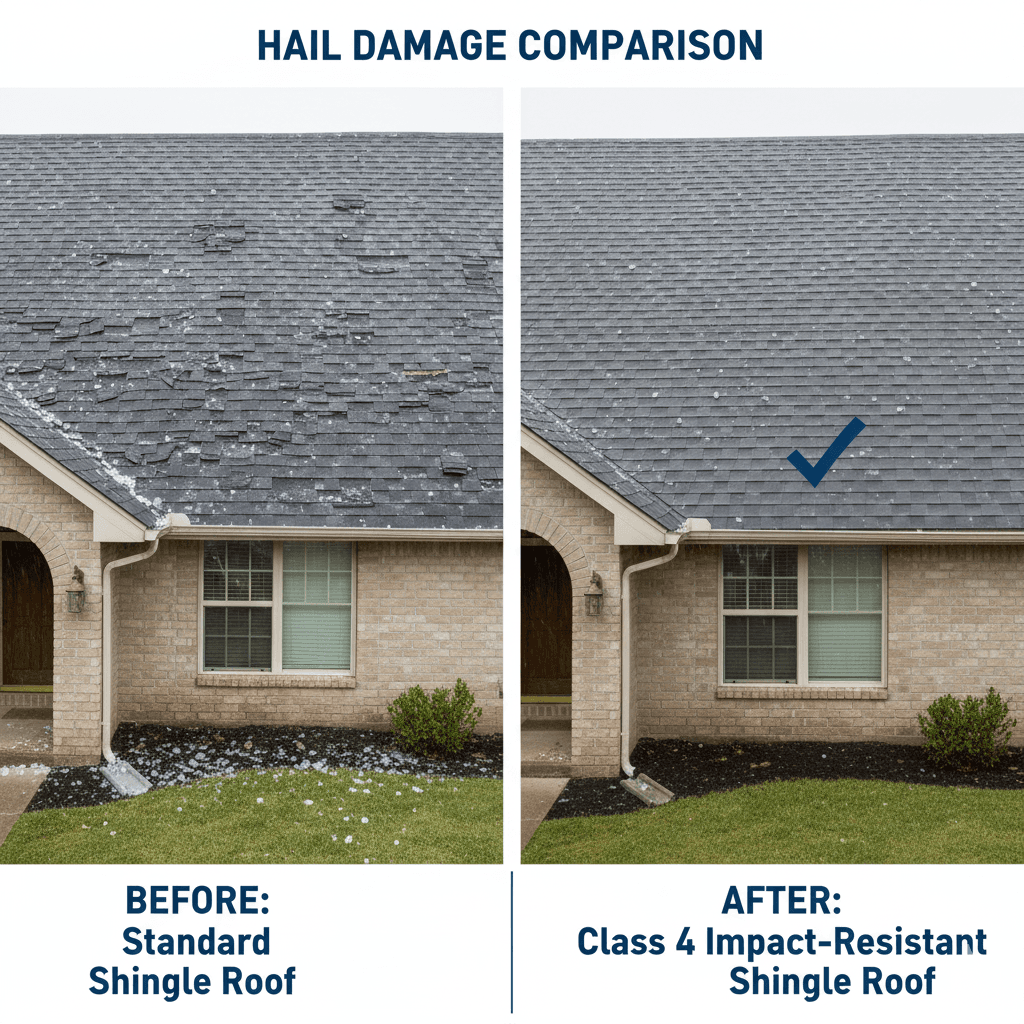
Shingle Damage:
- Missing shingles (bare spots on roof)
- Lifted or curled shingles
- Shingles on ground/in gutters
- Granule loss (shingles look shiny or bare)
- Cracked or broken shingles
- Dents or divots (hail impact)
Structural Damage:
- Sagging roof sections
- Visible holes or gaps
- Damaged flashing (metal around chimneys/vents)
- Chimney damage (missing bricks, cracks)
- Gutter damage (dents, separation from roof)
Debris:
- Tree branches on roof
- Hail accumulation
- Neighbor's roofing materials
- Blown-off building materials
Surrounding Property:
- Damaged fences
- Broken windows
- Siding damage
- Crushed AC unit or outdoor equipment
- Damaged vehicles
Document Exterior Damage
Photo checklist:
- ✓ All four sides of house (full roof views)
- ✓ Close-ups of visible damage (zoom in on missing/damaged shingles)
- ✓ Debris on roof or ground
- ✓ Gutters (especially if full of shingle granules)
- ✓ Flashing around chimneys, vents, skylights
- ✓ Any structural damage
- ✓ Neighboring homes (if they have damage too, indicates widespread storm impact)
Include context items in photos:
- Hail on ground (if still present—photograph with ruler for size reference)
- Damaged vehicles (proves hail size)
- Broken tree branches
- Street signs or other damaged property (proves storm severity)
If safe to access, collect 2-3 hail stones and freeze them (evidence of hail size for adjuster).
Note Weather Conditions
Record:
- Date and time of storm
- Weather description (hail size, wind speed if known)
- Duration of storm
- Check Austin weather service for official storm reports
Why this matters: Insurance adjusters verify storm occurred and severity. Official weather reports support your claim.
Emergency Mitigation: Stop Further Damage (First 2-6 Hours)
Texas law requires homeowners to mitigate further damage. Failure to do so can result in insurance denying additional damage claims.
Emergency Tarping (Most Critical Step)
When tarping is needed:
- Active leaks
- Missing shingles exposing roof deck
- Holes in roof
- Damaged flashing
- Severe shingle damage
DIY Tarping (Only if Safe):
Materials needed:
- Heavy-duty tarp (10-20 mil thickness, not cheap blue tarp)
- 2x4 lumber boards
- Sandbags or weighted objects
- Staples or nails
Basic tarping steps:
- Extend tarp 4-6 feet beyond damaged area on all sides
- Run tarp from ridge over damage and down to eaves (water flows over tarp, not under)
- Secure tarp with 2x4 boards and sandbags (don't nail through tarp—creates more holes)
- Ensure tarp extends beyond drip edge so water flows into gutters
⚠️ WARNING: DIY tarping is dangerous. Only attempt if:
- Roof pitch is low (not steep)
- Weather is clear and calm
- You have ladder safety experience
- You have someone spotting you
- You have proper footwear
Better option: Hire professional emergency tarping service.
Professional Emergency Tarping
Cost: $500-$1,500 (usually covered by insurance)
What professionals provide:
- Proper safety equipment (harnesses, ladders)
- Commercial-grade tarps
- Secure fastening (won't blow off in next storm)
- Same-day service (many offer 24/7 emergency response)
- Documentation for insurance (photos, invoice)
Austin 24/7 Emergency Services:
- Most licensed roofers offer emergency tarping
- Response time: 2-24 hours depending on storm severity
- Call multiple companies if first is overbooked
Insurance will reimburse emergency tarping costs—save receipts.
Interior Water Mitigation
Stop water damage from spreading:
- Extract standing water: Shop vac, mop, towels
- Dry out area: Fans, dehumidifiers, open windows (if weather permits)
- Remove wet materials: Wet carpet pads, saturated drywall (prevent mold)
- Protect belongings: Move furniture, cover with plastic
- Monitor for 48-72 hours: Continue drying to prevent mold growth
Mold growth begins within 24-48 hours of water intrusion—act fast.
If extensive water damage (multiple rooms, ceiling collapse):
- Call water restoration company (ServPro, Paul Davis, etc.)
- They'll extract water, dry structure, prevent mold
- Cost: $1,500-$10,000+ depending on extent
- Usually covered by insurance (document everything)
What Insurance Covers for Emergency Mitigation
Typically covered:
- Emergency tarping (reasonable cost)
- Water extraction and drying
- Debris removal (from storm, not pre-existing)
- Temporary repairs to prevent further damage
NOT typically covered:
- Permanent repairs (that's separate claim)
- Pre-existing damage
- Cosmetic repairs unrelated to storm
- Upgrades beyond original condition
Key requirement: Mitigation must be reasonable and necessary. $500 tarp = covered. $5,000 temporary repair when $500 tarp would suffice = may not be covered.
Contact Your Insurance Company (Within 24 Hours)
This is critical—many policies require prompt notification.
Before You Call Insurance
Have this information ready:
- Policy number
- Date and time of storm damage
- List of damage (roof, interior, other property)
- Photos/video ready to send
- Any emergency mitigation you've done (tarping, water extraction)
What to Say to Insurance
Initial call script:
'Hello, I'm calling to report storm damage to my home at [address]. A storm on [date] caused roof damage and water intrusion. I've taken photos and done emergency tarping to prevent further damage. I need to file a claim.'
They'll ask:
- When did damage occur?
- What type of storm (hail, wind, tornado)?
- What's damaged (roof, interior, other)?
- Have you done temporary repairs?
- Is home habitable?
They'll provide:
- Claim number (write this down—you'll need it for everything)
- Adjuster assignment (or timeline for assignment)
- Next steps (adjuster inspection, documentation requirements)
What NOT to Say
Avoid these phrases:
- ❌ 'I'm not sure when damage occurred' (implies pre-existing)
- ❌ 'My roof was already old' (gives them reason to deny/depreciate)
- ❌ 'I think it might have been damaged before' (red flag for denial)
- ❌ 'I don't have photos' (weakens your claim)
Instead:
- ✓ 'Storm occurred on [specific date]'
- ✓ 'I have extensive documentation'
- ✓ 'I've mitigated further damage per policy requirements'
- ✓ 'My roof was in good condition before the storm'
Document Your Insurance Conversations
Keep detailed records:
- Date and time of each call
- Name of representative
- Claim number
- What was discussed
- What they promised (adjuster visit date, etc.)
- Follow up in writing (email) confirming conversation
Why this matters: If insurance later denies claim or delays, you have proof of timely notification and their commitments.
The Insurance Adjuster Inspection
Insurance will send an adjuster to assess damage (usually within 3-10 days after storm, longer if widespread damage).
Before Adjuster Arrives
Do:
- ✓ Keep tarp in place (don't remove until adjuster sees it)
- ✓ Don't clean up debris (adjuster needs to see storm evidence)
- ✓ Organize your photos/videos
- ✓ Make list of all damage (roof, interior, other property)
- ✓ Get contractor estimate (optional but helpful)
Don't:
- ❌ Remove debris or damaged materials
- ❌ Start permanent repairs (adjuster needs to see damage)
- ❌ Pressure wash roof (removes hail impact evidence)
- ❌ Let contractor start work (insurance won't pay for unapproved work)
During Adjuster Visit
You should:
- Be present (don't let adjuster inspect alone)
- Point out ALL damage (they may miss things)
- Walk them through interior damage
- Provide photos/documentation
- Ask questions about their findings
- Get their assessment in writing
Have contractor present (Optional but Recommended):
- Experienced roofer can identify damage adjuster might miss
- Points out code violations requiring upgrades
- Provides professional perspective on severity
- Ensures adjuster documents everything
- Your contractor should NOT pressure adjuster—just observe and inform
What Adjuster is Looking For
Roof damage assessment:
- Number of hail impacts per 10x10 section (8-10+ = approval threshold)
- Shingle damage (functional damage vs cosmetic)
- Granule loss severity
- Structural damage (decking, flashing, etc.)
- Age of roof (affects depreciation)
Interior damage assessment:
- Water stains and extent
- Structural damage (drywall, insulation, framing)
- Flooring damage
- Personal property damage (furniture, electronics)
Adjuster's report determines:
- Whether claim is approved
- How much insurance will pay (RCV = Replacement Cost Value)
- What's covered vs not covered
- Depreciation amount (if applicable)
Red Flags: Bad Adjuster Behavior
Watch out for:
- ❌ Quick inspection (10-15 minutes for whole house = inadequate)
- ❌ Won't go in attic or on roof
- ❌ Dismisses damage as 'wear and tear'
- ❌ Pressures you to settle immediately
- ❌ Won't document damage you point out
If you experience this: Request supervisor review or independent adjuster. You have right to challenge lowball assessment.
Getting Professional Emergency Repairs
Emergency tarping is temporary—you need professional permanent repairs.
How to Find Legitimate Emergency Contractor
After major Austin storms, storm chasers flood the area. Here's how to avoid them:
Red flags (Storm Chasers):
- ❌ Door-to-door solicitation
- ❌ Out-of-state license plates
- ❌ Temporary local phone numbers
- ❌ High-pressure tactics ('sign today')
- ❌ Offers to waive deductible (insurance fraud)
- ❌ Asks for large upfront payment
Green flags (Legitimate Contractors):
- ✓ Established local presence (5+ years)
- ✓ Physical office address (not P.O. Box)
- ✓ Manufacturer certification (CertainTeed, GAF, etc. — Texas has no state roofing license)
- ✓ Comprehensive insurance (liability + workers comp)
- ✓ Strong local references and reviews
- ✓ Manufacturer certifications (CertainTeed, GAF, etc.)
- ✓ Written estimates and contracts
- ✓ 10-year workmanship warranty
How to verify contractor:
- Verify manufacturer certification directly with CertainTeed or GAF (Texas has no state roofing license to check)
- Verify insurance (request Certificate of Insurance)
- Check Google reviews and BBB rating
- Call references (past Austin customers)
- Verify physical office location (drive by)
Emergency Repair vs Permanent Repair
Emergency Repair (Temporary):
- Cost: $500-$3,000
- Scope: Tarping, basic leak stopping, secure loose shingles
- Timeline: Same-day to 48 hours
- Purpose: Prevent further damage until insurance approves permanent repair
- Usually covered by insurance
Permanent Repair (Full Fix):
- Cost: Varies ($3,000-$30,000+ depending on extent)
- Scope: Partial roof repair or full replacement
- Timeline: Wait for insurance approval first
- Purpose: Restore roof to pre-loss condition (or better if code requires)
- Covered by insurance minus deductible
DO NOT authorize permanent repairs until insurance adjuster has assessed and approved claim.
Working with Insurance and Contractor
Best practice timeline:
- Emergency tarping (Day 1-2): Stop immediate damage
- Insurance claim filed (Day 1)
- Adjuster inspection (Day 3-10)
- Contractor estimate (Day 3-10, can overlap with adjuster)
- Insurance approval (Day 10-20)
- Permanent repair (After approval)
Contractor's role in insurance process:
- Provides detailed estimate (scope and cost)
- Identifies damage adjuster may have missed
- Supplements adjuster report if needed (requests additional coverage)
- Coordinates repair timeline with insurance payment
- Completes work per approved scope
- Invoices insurance directly (assignment of benefits) or you pay and insurance reimburses
Understanding Your Insurance Coverage
What's Typically Covered (Wind and Hail Damage)
Usually covered:
- Roof repair or replacement (if damage meets threshold)
- Interior water damage from roof leak
- Structural repairs (damaged decking, rafters)
- Mold remediation (if resulted from covered leak)
- Temporary living expenses (if home uninhabitable)
- Debris removal
- Emergency mitigation (tarping, water extraction)
Deductible applies: You pay $1,000-$5,000 (or 1-2% of dwelling coverage) before insurance pays.
What's Typically NOT Covered
Usually NOT covered:
- Pre-existing damage or wear-and-tear
- Cosmetic damage (if shingles still function)
- Roof older than 15-20 years (some policies exclude or heavily depreciate)
- Damage from lack of maintenance
- Upgrades beyond restoring to original condition
- Code upgrades (unless you have code upgrade coverage)
Replacement Cost Value (RCV) vs Actual Cash Value (ACV)
Two payment methods:
Replacement Cost Value (RCV) - BEST:
- Insurance pays to replace roof with similar quality (current prices)
- Example: $20,000 roof replacement, $2,000 deductible = Insurance pays $18,000
- No depreciation applied
- Most homeowner policies use RCV for roofs under 15 years old
Actual Cash Value (ACV) - WORSE:
- Insurance pays replacement cost MINUS depreciation
- Example: $20,000 replacement cost, 50% depreciated = $10,000 ACV
- Minus $2,000 deductible = Insurance pays $8,000
- You pay remaining $12,000 out of pocket
- Common for roofs older than 15-20 years
Check your policy declarations page to see which you have.
Recoverable Depreciation (How RCV Payments Work)
Most RCV policies pay in two stages:
Stage 1: ACV Payment (Initial)
- Insurance pays replacement cost minus depreciation
- You use this to start repairs
- Example: $20,000 RCV, $5,000 depreciation, $2,000 deductible = $13,000 initial payment
Stage 2: Recoverable Depreciation (After Completion)
- After contractor completes work and you pay them
- Submit final invoice to insurance
- Insurance pays remaining depreciation
- Example: $5,000 depreciation paid after work complete
Total received: $18,000 ($13,000 ACV + $5,000 depreciation) Your cost: $2,000 (deductible)
IMPORTANT: You must complete repairs to recover depreciation. If you don't repair, you only get ACV payment.
Avoiding Common Post-Storm Scams
Austin sees spike in roofing scams after every major storm. Protect yourself.
Scam #1: 'Free Roof' or 'Waive Your Deductible'
The pitch: 'Sign with us and we'll waive your $2,000 deductible—you get a free roof!'
How it works (ILLEGAL):
- Contractor inflates estimate (adds $2,000 to price)
- Tells insurance the roof costs $22,000 (real cost: $20,000)
- Insurance pays $20,000 (minus deductible you don't pay)
- Contractor pockets the extra $2,000 (your 'waived' deductible)
- This is insurance fraud—felony in Texas
Why it's bad:
- You participated in insurance fraud (criminal liability)
- Insurance can cancel your policy
- Contractor cuts corners to make up inflated price
- If caught, insurance can sue you for overpayment
Legal alternative: Some contractors offer financing or payment plans for deductibles—that's legal if estimate is honest.
Scam #2: Storm Chasers
The pitch: Door-knockers saying 'We're working in your neighborhood and noticed your roof has storm damage. Sign today for special pricing.'
Red flags:
- Out-of-state company 'temporarily' in Austin
- Rent office space short-term (disappear after storm season)
- High-pressure tactics (sign now or lose spot)
- No local reputation or verifiable references
- Take large deposits and disappear
Why it's bad:
- Poor quality work (gone before problems surface)
- No warranty support (can't find them later)
- Often unlicensed/uninsured
- Use inferior materials
- Leave town before completing punch lists
Avoid by: Only hire established local contractors with 5+ years of Austin presence and verifiable physical office.
Scam #3: Lowball Estimates
The scenario:
- Company A: $18,000
- Company B: $17,500
- Company C: $9,000 ⚠️
Why ultra-low bids are scams:
- Use inferior materials (3-tab instead of architectural shingles)
- Skip critical steps (proper underlayment, flashing, ventilation)
- Unlicensed/uninsured (no overhead costs)
- Bait-and-switch ('discovered' issues add $10,000 mid-project)
- Abandons project after receiving payment
How to protect yourself: Get 3-5 quotes from licensed contractors. Choose middle-range bid from reputable company, never lowest bid from unknown contractor.
Scam #4: Assignment of Benefits Abuse
What it is: You sign document allowing contractor to negotiate directly with insurance and receive payment directly.
Legitimate use: Simplifies process—contractor handles insurance paperwork, gets paid directly, you just pay deductible.
Scam version:
- Contractor inflates scope beyond what's approved
- Adds unnecessary work
- Bills insurance for work not completed
- You're liable if insurance disputes charges
- Contractor sues you for difference if insurance doesn't pay their inflated bill
Protect yourself:
- Only sign AOB with established, reputable contractors
- Read AOB carefully (what are you authorizing?)
- Require contractor provide you with all documentation they send to insurance
- Verify contractor's estimate matches adjuster's approved scope
Post-Repair: Final Steps
After contractor completes permanent repairs:
Final Walkthrough Checklist
Exterior:
- ✓ Shingles straight and properly aligned
- ✓ Flashing around chimneys/vents properly installed
- ✓ Valleys secure and sealed
- ✓ Gutters cleaned and reattached
- ✓ No debris left on roof or in yard
- ✓ Magnetic sweep completed (no nails in yard)
Interior:
- ✓ Drywall repairs complete and painted
- ✓ No visible water stains
- ✓ Ceiling texture matched
- ✓ Flooring replaced if damaged
- ✓ Attic insulation restored
Only release final payment after everything is complete and satisfactory.
Submit for Recoverable Depreciation
If you have RCV coverage:
- Get final invoice from contractor (itemized)
- Take photos of completed work
- Submit to insurance along with invoice
- Insurance releases remaining depreciation payment (usually within 30 days)
Keep All Documentation
Store for at least 7 years:
- Insurance claim documents and correspondence
- Adjuster reports
- Contractor estimates and invoices
- Payment receipts
- Photos of damage and completed repairs
- Warranty documentation
Why: Needed for:
- Future insurance claims (shows roof age)
- Home sale disclosures
- Warranty claims
- Tax deductions (if applicable)
Monitor for Issues
First 30 days after repair:
- Check for leaks after first rain
- Look for any installation issues
- Document any problems immediately
- Contact contractor promptly for warranty repairs
Most reputable contractors offer 10-year workmanship warranty—use it if issues arise.
Frequently Asked Questions
Q: How quickly do I need to file an insurance claim after storm damage? A: Most policies require 'prompt' notification—within 24-72 hours is best. Delays can give insurance reason to deny claim.
Q: Can I choose my own contractor, or does insurance assign one? A: You choose your contractor—insurance cannot require you to use specific contractor. They may have 'preferred vendor' lists, but you're not obligated to use them.
Q: Should I get multiple estimates before filing insurance claim? A: You can, but file claim immediately to meet notification requirements. Get estimates while waiting for adjuster—having contractor estimate before adjuster visit is helpful.
Q: What if insurance estimate is lower than contractor's estimate? A: Common issue. Your contractor can submit 'supplement' to insurance explaining why additional work is needed. If insurance still denies, you can: (1) Pay difference yourself, (2) Get additional independent estimate, (3) Hire public adjuster, or (4) Appeal insurance decision.
Q: How long does insurance claim process take? A: 2-8 weeks typically:
- Week 1-2: Adjuster inspection and report
- Week 2-4: Claim approval and payment
- Week 4-8: Repairs completed
After widespread storms, process takes longer (6-12 weeks).
Q: Can I do temporary repairs myself, or do I need professional? A: You can do basic mitigation (buckets, tarps), but keep it reasonable. Insurance won't pay $5,000 for repairs you could have prevented with $500 tarp. Professional emergency tarping ($500-$1,500) is safest approach.
Q: What if I can't afford my deductible? A: Options:
- Financing through contractor (0% for 12-24 months often available)
- Home equity loan or line of credit
- Payment plan with contractor (some offer this)
- Do NOT let contractor 'waive' deductible—that's insurance fraud
Q: Should I hire a public adjuster? A: Maybe. Public adjusters negotiate with insurance on your behalf and take 10-15% of settlement. Consider if:
- Large claim ($20,000+)
- Insurance denies or lowballs claim
- You don't have time to manage process
- You're unfamiliar with insurance claims
For straightforward claims with honest contractors helping, public adjuster may not be necessary.
Q: How long do I have to complete repairs after insurance pays? A: Policies vary, but typically 1-2 years to recover depreciation. Check your policy for specific timeline—if you don't complete repairs within that window, you forfeit recoverable depreciation.
Q: What if storm damaged other property (fence, AC unit, siding)? A: Include ALL storm damage in single claim. Same deductible applies to entire claim, so document and report everything at once.
Your Emergency Action Plan Checklist
Print and keep this checklist accessible:
Immediate (First Hour)
- ☐ Ensure safety (stay off roof, check for hazards)
- ☐ Place buckets under active leaks
- ☐ Turn off electricity in affected areas
- ☐ Photograph interior damage (20+ photos)
- ☐ Assess exterior damage from ground (photograph all sides)
First 24 Hours
- ☐ Emergency tarping (DIY or professional)
- ☐ Water extraction and drying (prevent mold)
- ☐ Contact insurance company (get claim number)
- ☐ Document all mitigation efforts (photos, receipts)
- ☐ Begin researching reputable contractors
First Week
- ☐ Meet with insurance adjuster
- ☐ Get 3-5 contractor estimates
- ☐ Verify contractor licenses and insurance
- ☐ Continue monitoring for additional damage
- ☐ Follow up with insurance on claim status
After Approval
- ☐ Select contractor and sign contract
- ☐ Schedule permanent repairs
- ☐ Monitor work progress
- ☐ Complete final walkthrough
- ☐ Submit for recoverable depreciation
- ☐ Keep all documentation
24/7 Emergency Roof Repair - Austin
Ripple Roofing & Construction offers emergency storm damage services:
✓ 24/7 emergency response (512) 763-5277 ✓ Same-day emergency tarping ($500-$1,500, insurance reimbursable) ✓ Free damage assessment and insurance documentation ✓ Direct insurance billing (assignment of benefits) ✓ Local, owner-operated (not storm chasers) ✓ Fully insured ✓ 10-year workmanship warranty ✓ 5.0-star Google reviews
We handle:
- Emergency tarping and leak mitigation
- Insurance adjuster coordination
- Complete damage documentation
- Permanent roof repair or replacement
- Interior water damage repairs
- Supplemental claim support
After storms, we're here for our Austin neighbors—not here today, gone tomorrow.
📞 Emergency Line: (512) 763-5277 (24/7)
📧 Email tx@rippleroofs.com
Serving Round Rock, Austin, Georgetown, Cedar Park, Pflugerville, Leander, and all Central Texas.
Last updated: November 2025. Insurance and legal information based on typical Texas homeowner policies and Texas Insurance Code. Specific coverage varies by policy—consult your policy documents and insurance representative.